Free Shipping
on orders over £50
on orders over £50
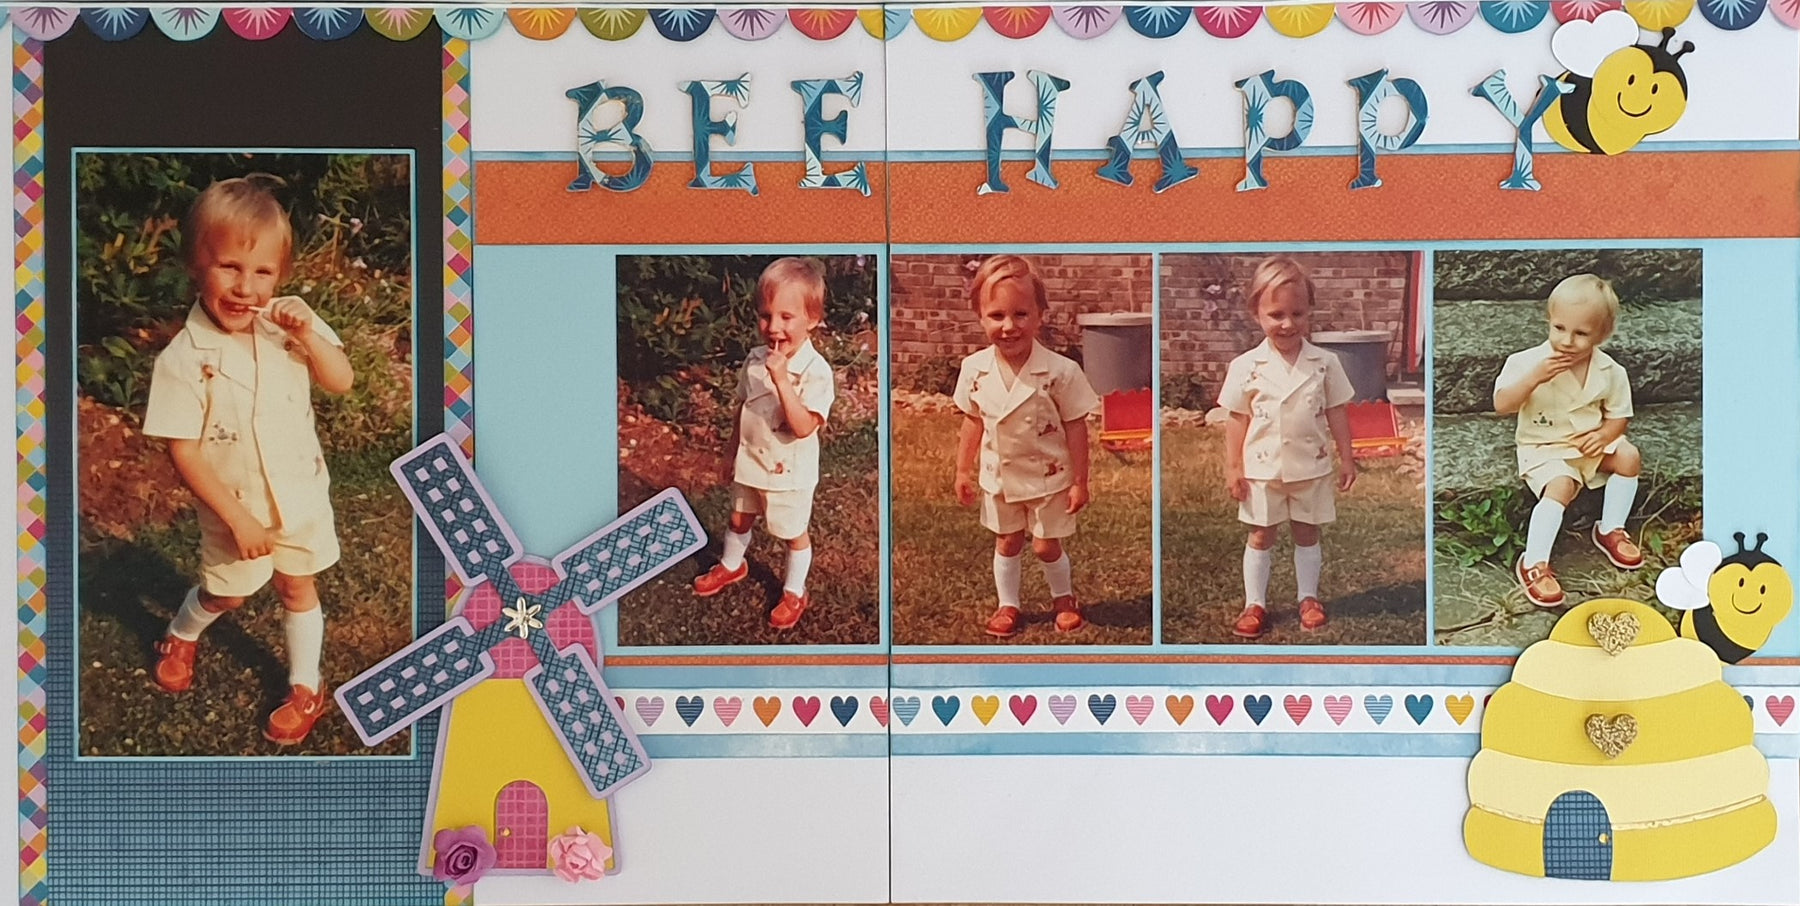

Bee Happy
The papers this month are from Paige Evans, Wonders range. The papers are lovely summer colours and perfect for those summer photographs. My photographs are of my son when he was around 20 months all set for a family wedding. I just loved those Jumping Jack shoes (not even sure if you can still buy Jumping Jacks!)
I meant to add journaling but forgot and ran out of space so I will probably either add a hidden tag or add it to the back.
I used one 8” x 4⅜” photo and four 5¼” x 3½” photos, all portrait orientation. I inked all the edges of the papers with Broken China distress ink.

My base is two sheets of Coconut Swirl. The mats are two pieces of 11 Wonders centred on the page top/bottom and cut to 8⅛”x 5½” (left side, lined up with the right-hand edge) and 8⅛” x 12” (right side). These are then layered with 17 Wonders (reverse side) cut to 6¾” x 5½” and 6¾” x 12” and then two pieces of Starmist cardstock cut to 5½” x 5½” (left page) and 5½” x 12” (right page). I placed the 17 Wonders layers, so they were ⅛” from the top of the 11 Wonders layer and the cardstock layer ⅛” from the bottom of the 17 wonders layer.
For the large photograph I used a piece of 6 Wonders (reverse side) 12” x 6” and Starmist cardstock 8⅛” x 4½”. I placed the 6 Wonders piece to the left of the mat on the left-hand page. I cut the diamond chequered strip from 15 Wonders and cut this in half and placed these strips on the left-hand and right-hand edges of the 6 wonders piece and then centred the piece of Starmist cardstock on top.

For the top of the pages, I cut two strips of the half circles from 6 wonders and pop dotted these to the top of both pages. Because I wanted the 6 Wonder photo mat to be cut vertically, I needed another sheet of 6 wonders. I also cut two of the heart border strips from two sheets of 15 Wonders and centred these across the bottom of 11 Wonders on both pages.

I die cut my title from chipboard and 11 Wonders, stuck these together and foiled the edges of the letters then added these to the top of the layout.

I then made my embellishments a windmill, a beehive and two bees as these are embroidered on Phillip’s outfit. I cut the windmill and beehive on my Silhouette Cameo. I used two strips of foiled cardstock and the glitter hearts on my beehive, and two of the paper flowers on my windmill and attached the sails with a brad so they spin. Both the beehive and windmill were attached with pop dots. To finish off I added two small gold rhinestones to the doors on the windmill and beehive.
For me, it is a traditional scrapbooking layout. Hope you like it.

Products Used:
Scrapaholix July Main Kit & Add On Kit - July Scrapaholix kits - Wonders and Sticky Embossing Powder — The Mad Scrapper
Extra cardstock and papers used
1 x 6 Wonders
1 x 11 Wonders
1 x 15 Wonders
1 x 17 Wonders
Other products used –
Tim Holtz Distress Ink Pad - Broken China — The Mad Scrapper or Tim Holtz Mini Distress Ink Pad - Broken China — The Mad Scrapper
Scor-Tape - 1/4" Double Sided Tape — The Mad Scrapper
Scor-Tape - 1/8" Double Sided Tape — The Mad Scrapper
Adhesive Dots Roll - 3D — The Mad Scrapper
From my stash -
Gold Rhinestones but Janine has similar here - Self-Adhesive Rhinestones - Deep Yellow — The Mad Scrapper
Leave a comment